Showing posts with label Gift ideas. Show all posts

Thursday, February 9, 2012

Valentine gifts for grandkids!

NAME TAGS!

These tags are for luggage, gym bags, music bags or sports bags!

I've had the embroidery applique designs for several months and kept delay making them as I had not done anything like that before.  (It uses the heavy stabilizer inside, so it's pretty thick.)

However, once I got started the instructions were very easy to follow.  The designs are from "Tag-A-Long" Embroidery Collection by Hope Yoder.

You can't tell, but these tags are 5-6" long, a nice size.  I am going to get some ribbons to tie on the flip flops for the girls and maybe a chain for Jake's.

There is a danger of having name tags on kid's bags (everyone is aware of those dangers I think), but in my grandkids' situations they are never anywhere that their parents aren't nearby. 

They turned out so well, that I think I'll be making me a new ID tag for my quilt guild!  Now to go get something (candy??) to go with these tags!

Wednesday, December 21, 2011

A quick and FUN gift for machine embroiderers!

Okay, I have seen these before, but never attempted them.  It was on my "TO DO" list SOMEDAY.  Well, I was needing some inexpensive fun gifts and thought of them last night when I couldn't sleep. 


Embroidering on toilet tissue is interesting.  I had no trouble with it tearing at all.  I was careful though.  Using three thicknesses folded under and cut-away stabilizer, it was really quite easy.  I would suggest not using a dense design.  I liked the lightness of the snowmen.

The toilet paper brands I used were Cottonelle and Angel Soft.  I prefer the Cottonelle, a little more durable, but the Angel Soft worked fine too.  I am sure that I need to change my needle too, after sewing through all that paper, it's bound to be a little dull.

They are so easy and depending on what design you choose pretty darn quick!  I made the flowers first and then decided I didn't want to change threads because I needed several rolls and found the SNOWMEN!  I think they're cuter anyway.

So instead of cleaning today, I was in the sewing room.  That dust will still be there tomorrow! Put that off as long as possible. Here's what I ended up with:


I may have gotten a little carried away!  Here are some closeups:


When my husband saw these, he laughed and said, "what will you do next?"  Who knows!  MERRY CHRISTMAS!


Tuesday, September 20, 2011

Embroidered Burp Pads!

My sister asked me to embroider some burp pads for a co-worker's daughter so that's what I did this morning.  Pretty simple and quick! 
I got some Carter's cloth diapers at Wal-Mart to use.  They really are super for burp pads.   They have that extra padding in the center which is perfect.


I also made one with the baby's name on it.  Now get this--the baby isn't born yet.  Things change.  I made a quilt once and put the label on it with the baby's supposedly "name" on it.  Yup, you guessed it. They decided on another name.  I told them I'd take the label off and re-do it, but I never got it back.  Who knows if they took it off or not.  Hope so.  Rather have no quilt label, than the wrong name on it for the poor child.

I may have to start selling these for people.  Maybe I could make enough to pay for my thread!!  Anyone need some??

Tuesday, June 7, 2011

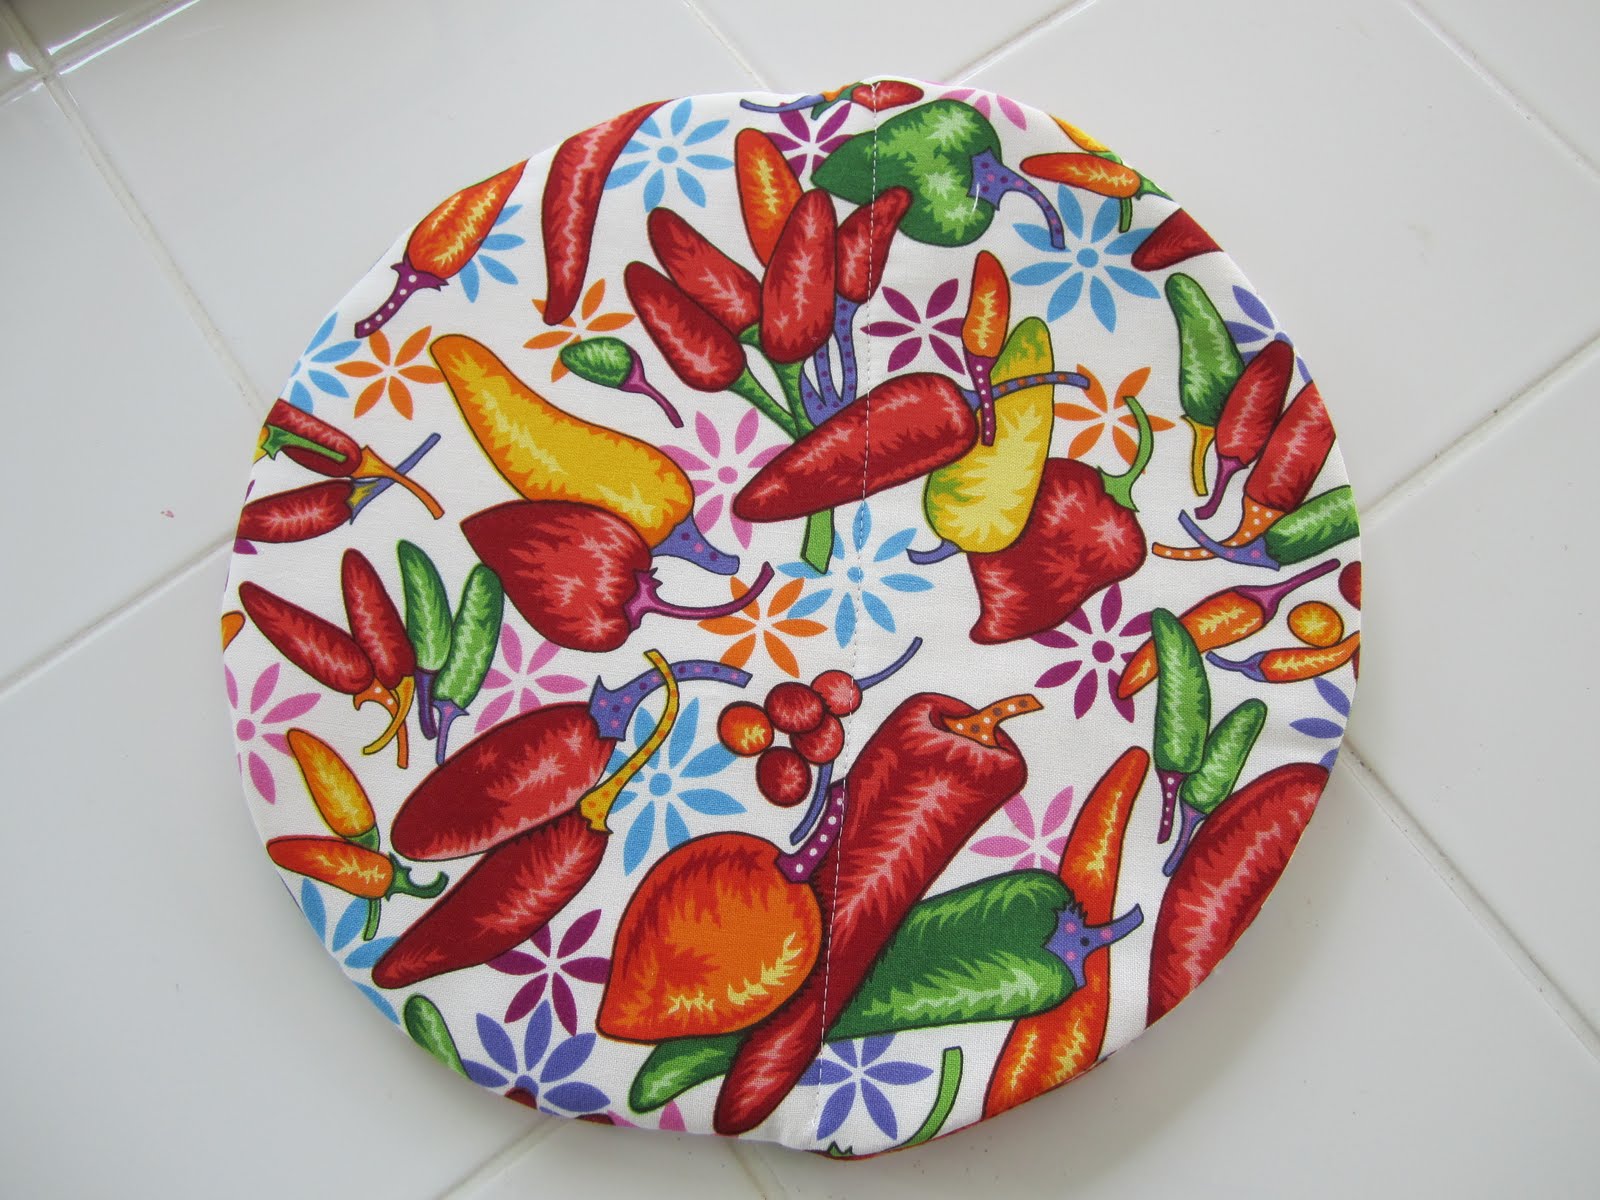
Tortilla Steamer

Today I made some of those very easy tortilla steamers.  You insert your tortillas and stick them in the microwave for a couple of minutes to heat them.  Of course, the time varies from microwave to microwave.  We eat a lot of Mexican food and love flour tortillas.  This will be used a lot.

I have one of those plastic tortilla "bowls" with the lid like you see in the restaurants.  One time I put that in the microwave.  Not too smart.  I didn't think I'd ever get that lid off!  I learned you heat them first then put them in those containers. 


The next picture shows that one half of the steamer opens up to insert the tortillas.

The pattern is by Legacy and really a quick project.  The only thing you must remember is to use 100% cotton fabrics AND batting. 

You can even put potatoes or frozen corn on the cob in there too.    I may get some potato or corn fabric and make me some more of these!  Too cute!

Tuesday, April 26, 2011

Easter was wonderful even though it was rainy!!

It was a good weekend even though the weather could have been better!

The Texas kids came in Saturday and the others came shortly afterwards.  You just can't keep those cousins apart!  (I love that.  I hope they're always close!)  Anyway, the afternoon was spent dyeing eggs and then we went to the lake and Julie who has a nice camera and taking classes on digital photography, took photos of our trike and new trailer. 


As you can see Jake is no where to be found.  I guess 10 year old boys are past the thrill of dyeing eggs.

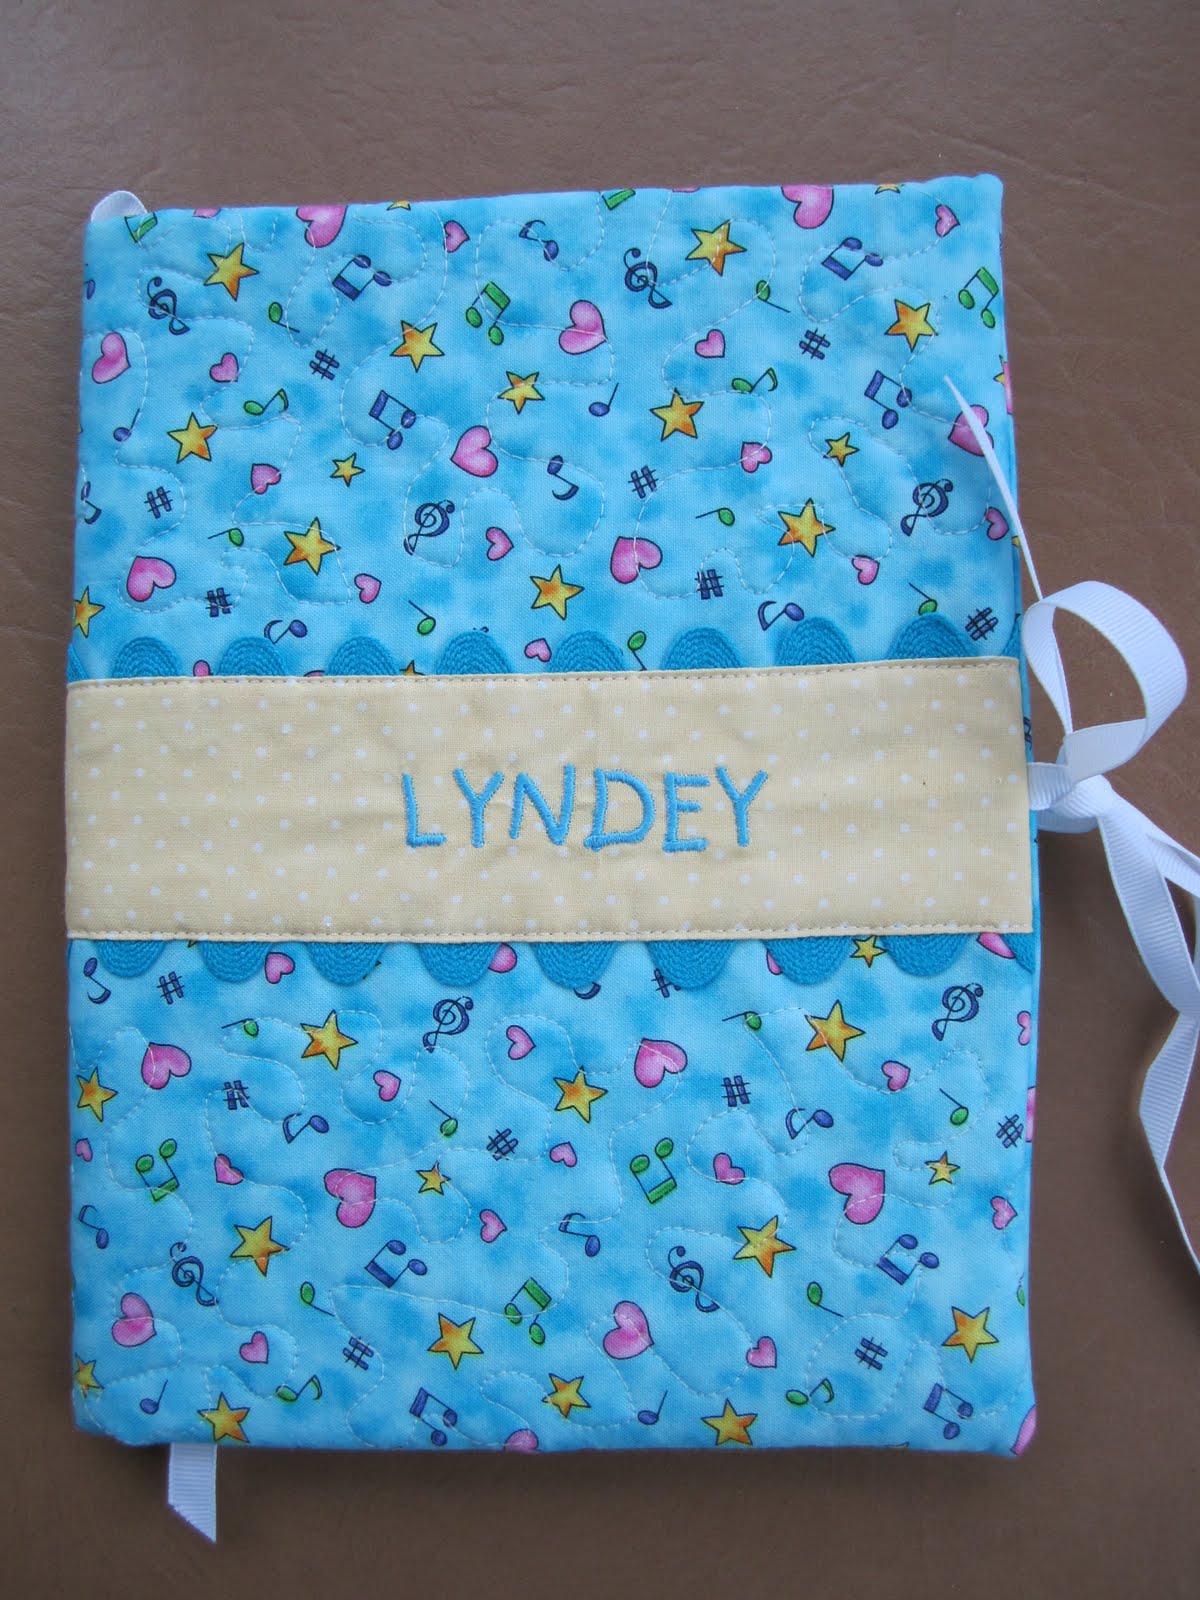
I had made journal covers for the girls for little Easter gifts.  All three of them love writing notes and drawing so I thought it would be perfect.  They took them to the lake, see.......


The covers fit the composition books you can buy at Wal-Mart.  I should have taken a photo of the inside.  There's a sectional area for three pencils.  I want to make myself one sometime soon.  Here's how cute they turned out.  


I got Jake a new tacklebox and some fishing items.  He loves fishing and can sit there FOREVER!!!  He decided to leave the box here so he'll have his own stuff here when he visits.  I did ask him if he was disappointed he didn't get a journal--he said, "Yeah, right, Nana!"

He did bring six, yes, SIX nerf guns to play with.  We had a nerf war in the backyard.  Fun, even though we were picking up the ammo forever.


Oh, and Paige, got her first pedicure.


Zebra designs!  She told me that she had thought a pedicure was where you took your "pets" to get their nails done.  We all got a laugh out of that remark.  She told Kayley, her cousin, that she was a little scared  when she saw all the "tools" the manicurist used on her feet.  She's only 8 1/2 and had her first pedicure.  Guess what, I've never had one.  

My kitchen sink decided to clog COMPLETELY on Saturday evening, so we moved Easter dinner at Stacey's (DD2).   She has a big home and since it was raining, the egg hunt had to be inside and she has a huge grand room.  All the aunts and uncles came and we had a feast.  I'd post a pic of that but, Julie took those pictures and she hasn't shared yet.

The last few years, we started adding coins in addition to candy to the plastic eggs and the kids really enjoy that.  They always have to see who came up with the most $$$.  And my newest grand neice, Sloane, who is 9 months old, got to participate too.  She didn't know quite what was going on, but she will learn!!

Isn't she a doll!

I hope you all had a wonderful Easter too!


Tuesday, March 8, 2011

Cosmetic Bags

I've been making the cutest little bags lately.  So simple AND quick.

This one I added the rickrack.  It seems rickrack has really made a comeback lately. And this jumbo size does make a statement!

The body of the purse/bag used a flip and sew method to quilt it.


On this bag I added a handle. Straight line quilting was all I did on this one.


This was the smallest bag made and I did free motion quilting on the bottom portion of it.  A little butterfly
button  chose its home on the upper green section.

It seems like lots of quilt stores are selling the very colorful zippers and it really is fun to use them in projects like this.  They show up so well!


As you can tell the bags are all different sizes, very easily done.  I think I'll be giving them as cosmetic bags for ovenight trips.

Sunday, January 9, 2011

Mug Rugs, Mug Mats, whatever you want to call them!

Mug rugs seem to be everywhere especially the last few months.  I had seen the small square ones similar to coasters but I really like the new bigger versions.

I needed some small gifts for Christmas and here is my version:


Embroidered Mug Mats
The dimensions are around 6" x 9", perfect for your favorite cup/mug and room for your snacks too.  I found the coffee cup fabric at my local quilt store.  Thought it was perfect.   I used my 730 for the embroidered name and I did minimal quilting--just straight stitching.
I tried machine stitching the binding on one of them and just didn't like the look, so I hand stitched the binding on the back of the rest.  It took a little more time but I think it looks better on the back.  Wish I had made myself one!

There may be a mug mat swap coming up at Quilting Gallery if you want to join it.

Friday, December 10, 2010

More table runners!

The past few weeks I've been on a table runner making "kick".  There so many patterns out there and you can make and quilt a table runner very quickly.  They make nice gifts too!
On this one, I used my paint sticks that I have had for over a year.  I used a stencil to make the black blocks.  It was pretty fun, but not quite as easy as I thought it would be.   I should have made two, as both my daughters wanted it.  Guess I'll have to make another.

Now the next one is a project made for my guild challenge.  We all had the same 1/2 yard of fabric and could make anything we wanted.  The fabric we all had was the green with colored circles on it.  I shouldn't be posting it yet, because it's suppose to be a surprise next Tuesday, but I don't think any of the members read my blog, so I should be okay.  Nothing outstanding but it's done!


Now the next runners are the easiest I've ever done.

All you need for one is:


1/3 yard focal fabric
1/2 yard coordinating for backing and hem
18" x 44" batting (optional)

Put the focal fabric and backing fabric right sides together, aligning the raw edges.  (If using batting, place it on top and match raw edges.)  Pin and sew long sides.

Turn right sides out and press, leaving an equal amount of the back fabric on each side of the focal fabric.


Stitch in the ditch on both sides where the two fabrics meet.  I chose to use a decorative stitch.

Trim any excess off short ends of runner.

Fold one short end with back fabric right sides together; stitch along raw edge.  Trim corner and turn right side out to form a point.  Tack down point or use decorative button or ribbon to hold down in place.  Repeat on other end. 

And you are done!


This is about 14 1/2" x 44" tip to tip!   Not real long, but you could adjust to fit any table.

So I think I'm done with table runners for a while.  That is, unless I find another I just can't do without! 

Monday, December 6, 2010

Make a Christmas Plate with Fabric!

While we were in Texas visiting, Paige and I made the cutest Christmas plates.  She and I don't get to do many "Plan B's" which is what we call craft projects, and it was a lot of fun.  She is always willing to learn something new.


Let me tell you how easy this is to do.  Go to Wal-Mart or anywhere that sells clear glass plates and get you a supply.  You'll want to do a bunch once you get started.  Get some Mod Podge glue/sealer.  I didn't know they had a Fabric Mod Podge, but they do.  I purchased that but I'm sure the plain Mod Podge will work just as well.

We used sponge brushes.  Rob your stash for fabric or buy some fabric.  It doesn't take much.  Just enough to cover the plates.  Wash the plates and dry well.  It took us longer to get those dang stickers off than anything. Then all you do is apply the glue to the back of the plate.  Lay fabric right side down on back of plate.  You want to be able to see the right side of the fabric through the top of the plate.

Once you have smoothed the fabric on the back of the plate, use your scissors to cut fabric around the edges.  Then all you do is apply a coat of Mod Podge over the fabric and let dry.


This is the end result. 

How cute are they?!  And so easy.  Put some cookies, candies, or breads on one and you have such a nice gift for your neighbors, teachers, mailman, beautician, or anyone else you can think of.  Just be sure to tell the recipients they CANNOT immerse the plates in water.  Just wash the tops.

Didn't Paige do a great job!

If you are interested in doing this and want to see a "you tube" tutorial, check out Missouri Star Quilt Co  They do such a great job on all their tutorials!

Sunday, October 24, 2010

Easy Peasy Checkbook Cover

Today I made the easiest checkbook cover ever!!

While I was surfing the net and enjoying lots of other blogs I can across this tutorial at Crazy Moms Quilts.  This is the quickest thing I've ever done and it's so cute.

I'll leave the detailed instructions at Crazy Mom's site, (she has three different styles) but here are my photos to show the easy steps.  And yes, I did do the easiest style.  I have other projects on my plate as usual!!


Two fabrics!


Everything fits perfectly!


Two pockets as needed
I love this because it just has interfacing on the fabric, so it is very lightweight!  I'm thinking you could use this for lots of things--coupon carrier, small wallet size photo carrier--what else can you think of???

Wednesday, October 13, 2010

Candle Mat

I joined the "Candle Mat Swap" at the Quilting Gallery and it is so addictive.  So far, I've made three tops.  I needed one for the swap and then thought I'd make myself one.  Then I thought I need some quick little gifts for Christmas and this pattern is perfect!

 The neat thing about this little mat is the size.  It's only 14" square, but has 56 pieces in it.  That sounds pretty daunting, but it adds such excitement.   You can make two mats (tops) with a charm pack and have some left over.

I took a few photos when I made the brown one:

In the first picture you can see I just had the two fabrics in the piano keys.  The second picture I added another green--didn't like it as much.

Then I auditioned a square in the middle of the center.  I liked it, it tied in the corners, but in the end I decided it wouldn't show when the candle was put on it.  So I left it off.  Maybe I'll try that on another mat.

What I love about this pattern is the many different ways you can change the look of it by just changing the fabrics in different places--the corners, center, border  around the center, piano keys.  And that doesn't even count the embellishments you could add, which I haven't ventured into YET!

Tuesday, August 31, 2010

Car Trash Bag

Yesterday I made a trash bag for the car.  I can't stand trash in the floor of my vehicles, so I'm constantly putting trash in the side compartments of the doors.  Needless to say, that fills up pretty quickly and hard to clean.  

I have this wonderful book, "One-Yard Wonders", that I've had for several months.  It has 101 sewing projects that can be made in a flash.  This bag was one of them.  

It was suppose to have a buckle on the straps, but of course, our small Wal-Mart didn't have any, so I just used some velcro and it worked very well.

I love the second pocket also.  The big pocket will be for trash and the side pocket will be for tissues.  And I can just throw it in the wash when it needs to be cleaned.  Now if I had thought about it, I would have embroidered something really cute on it, but didn't, so next time....

Saturday, January 16, 2010

Shoe Bag

Since we will be taking a trip soon, I decided I needed a shoe bag.  I began looking for an embroidery design and when I saw this one, I looked no more.  It was perfect.  Every time I say that phrase out loud, I crack up.   : )


I may change the drawstring.  There is blue in the shoe, but not a lot. 

Now, do I make one for Rob, my husband??  Probably not like this one.  Maybe one with his name or initials!

Thursday, December 31, 2009

Wrapping Clothesline!


When my brother-in-law, Jim,  hears what I've been doing, he's going to give me a hard time.  What is the purpose--he would say.  One time when I was "making paper" he dropped by and said I had too much free time.  But he just doesn't see my "creative side".  : )  That's my opinion and I'm sticking to it.

Anyway, I spent the day yesterday making bowls from wrapped clothesline.  It was fun.  I probably would have made more but I ran out of clothesline!  My bernina sewed through that clothesline like butter.  My dealer had suggested using the double cord #59/59C foot, but I tried using my open embroidery #20C and had no problem at all.  Having the grooved foot would be useful though if you had one.

I used 3/16"  polypropylene reinforced cotton clothesline.  The book which I used was "It's a Wrap" by Susan Breier  You can make coasters, purses, bowls of all kinds, lids, and embellish with all sorts of things, like buttons, beads, yo yos, etc.

I may try more later, but probably not. Need to finish some old projects that I've started and pushed aside.  Sometimes you just have to stop what you're doing and try new things.  I think I do that too often.  Oh, well.  Life is too short not to do what you want when you want to do it.

Tonight we're going to my sister's house to bring in the new year.  A quiet evening of playing cards and maybe a game of Wii.   Hope it's clear enough to see that "Blue Moon".   HAPPY NEW YEAR!